My new Computer

I have a new computer!  My time has come to get a dedicated Home Theater PC (HTPC), to connect to my Sony 37″ 1080p LCD TV.  I spent several weeks researching, as I was quite specific with my requirements.

  • Must be quiet
  • Should look good in the living room
  • Needs to have a good range of video/audio outputs
  • 1080p (full HD) video shouldn’t pose a problem

With the above in mind, my first stop was check out the usual suspects.  First, I considered the wonderfully designed Apple TV and Apple Mac mini.  These are massively expensive, and really don’t offer that much in terms of performance or features.  The Apple TV dies with it’s lack of optical drive, while the Mac mini is low spec and doesn’t have HDMI output.  Next up, was the Dell Inspiron Zino HD.  Again, this box looks brilliant, but the hardware specs aren’t great given it’s price.  The glaring omission is the lack of multi-channel audio output, so no surround sound here!

At this point I decided to start looking at the range of Mini-ITX motherboards on the market, with the aim to building my own machine.  Mini-ITX are tiny PCs, which are 17cm square in size.  Very quickly I came to the conclusion that I would need a dual core Intel Atom N330 and an nVidia ION chipset.  The other options on the Mini-ITX format are either too low performance or have too many fans so are pretty loud.  I settled on the following:

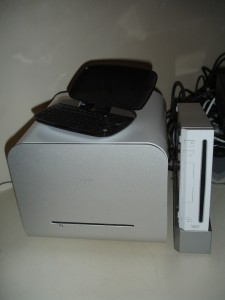
The final PC, along with the keyboard sitting on top.

Assembly of the above was a breeze, with one exception.  The SATA cable supplied for the slimline DVD drive doesn’t fit in the case.  The back of the drive is too close to the edge of the case, but thankfully I have a pile of them and found one that fit.

Upon first boot (connected via HDMI to my TV), everything worked fine.  I booted and installed Windows 7 Ultimate, and then started to test a few videos out.  At first the results were poor, with many videos not playing smoothly.  I quickly discovered that the CPU was pegging at 100%, causing all the issues.  Video’s were being decoded by the CPU, rather than taking advantage of nVidia’s CUDA technology.  I installed CoreAVC and almost everything is fine, with videos playing at 1080p without trouble.  Cue BBC iPlayer problems.

Adobe Flash 10.0 (the current version) also uses the CPU to decode video, however the upcoming Flash 10.1 will fix this.  You can download this from Adobe Labs to test for yourself.  It’s not very stable at the moment, but does work.

Finally, I wanted to get a nicer interface than just vanilla Windows Media Center.  As I am used to it, I have decided to go with XBMC using the Aeon skin.  Now it’s all up and running and works perfectly!
Samsung Q210 WiFi Upgrade

Happy New Year everyone!  One of the things I have resolved to do in 2010 is to update this blog more often, so hopefully you will see more of my geekyness grace these pages soon.

Today I’ve spent half my day diagnosing a problem and then upgrading my girlfriend’s laptop.  As I’ve found precious little information online, I thought I would share my work here.

The problem: Poor WiFi speed and regular disconnects on a Samsung Q210 laptop.

The cause: The Intel WiFi Link 5100 PCI Express MiniCard is known to have many problems, and is unfortunately the card Samsung choose to use in the Q210.  A quick Google search for Intel 5100 problems returns 400,000 results.

The solution: A simple upgrade to an Intel WiFi Link 5300, which cost me £23.  I chose not to install a third antenna, and only connect the existing two to TR1 & TR2, which means it will only get speeds of up to 300mbps, not the 450mbps the card is capable.  Except the upgrade wasn’t as easy as I’d hoped…

Samsung, in common with most laptop manufacturers would rather you didn’t dismantle their devices, so the Q210 is very hard to crack into.  I’ll try to describe, with a few photos, what I did and if you have any questions, please just reply to this post and I’ll try get back to you.  You will need a small phillips screwdriver and a small flathead screwdriver.

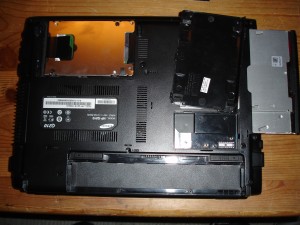
First (rather obviously), you need to unplug the laptop and remove the battery.  You will then need to remove 4 small length screws from the back of the laptop, labeled ODD (Optical Disc Drive, 1 screw), HDD (Hard Disc Drive, 2 screws) and MiniCard (1 screw).  Remove the ODD via sliding it out of the laptop chassis.  The MiniCard cover should just lift off, and the laptop I was working on had no card inside.  The HDD cover slides forward about 5mm, then lift it up (there are four catches, two on the bottom and two on the outside edge – opposite the screws).  Now you will see the HDD itself (with a metal case over it) and a black tape attached to the top of it.  Pull on the black tape to lift the HDD out of the laptop.

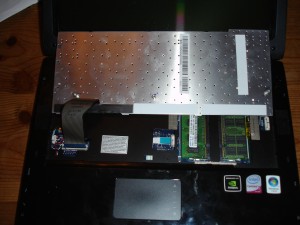
Next you will need to remove the keyboard.  The instructions for this bit are clearly outlined with images in the user guide, which you can download directly from the Samsung website.  Remove three medium length screws from the back of the laptop, labeled KBD.  Now release the three clips on the bottom of the keyboard itself, using your flathead screwdriver (as outlined in the user guide).  Be gentle here, as it is very easy to scratch the case.  Carefully lift the keyboard away, and disconnect the ribbon cable from the mainboard by opening the lock and pulling towards the LCD (again, outlined in the user guide).  Finally for this step, remove the RAM modules.

Now we come to taking the top of the laptop off.  On the underside, you will have to remove 2 large length screws, 7 medium length screws and 4 small length screws.  Back on the top side you will also need to remove 1 medium length screw from just under the RAM slots (marked with an arrow).  Still on the top side you now need to very carefully disconnect the speaker cable on the left by pulling it to the right.  On the right hand side you will see the touchpad ribbon cable, which you will also need to disconnect by opening the lock and pulling to the left.  You are now ready to lift the top off.  There are a few catches along the edges which should pop off fairly easily as you lift.  I found the hardest one to lift up to be just under the touchpad buttons, so gently used my flathead screwdriver to pop it open.  Before you lift the top off, this is very important, you need to reach inside and disconnect the microphone cable (on the left) from the mainboard.

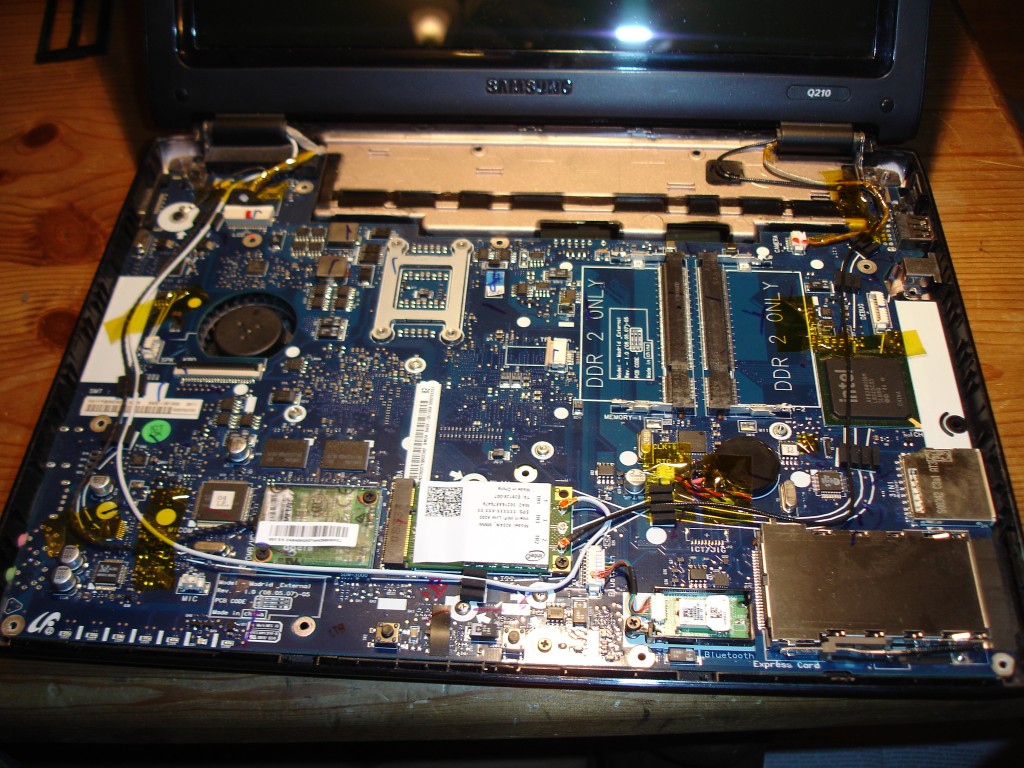
Finally you are inside.  The WiFi card is in front of you, under where the touchpad was.  Pull upwards on the white and black cable ends, lifting them off the card.  Then remove the single small length screw holding it in place and the card will pop up (much like a DIMM would).  Remove the card, and replace this with your new 5300, and screw it into place.  The cables go back in the same way, leaving TR3 disconnected (i.e. white to TR1 and black to TR2).  It shouldn’t matter if you get these the wrong way round, but this is the way I did it.  You can now put everything back together (basically the same steps as above, but in reverse).

You would think that your upgrade would now be complete, but no such luck!  I had a software related issue which stopped the card working.  There is an issue with the current version of Kaspersky Internet Security, which prevented the WiFi card from starting correctly within Windows 7 Ultimate.  Took me ages to find this out, but to fix it is very simple.  Disable Kaspersky by right clicking it’s icon in the taskbar and selecting Pause Protection.  Reboot your laptop, and now your WiFi card will be able to find all your networks.  Connect to the network of your choice, and then resume Kaspersky protection.  Finally, you are complete and the card will work normally now.

I hope this is some help to people, as it took me most the day to find the problem, figure out how to get into the laptop, and then figure out the Kaspersky problem!  Have fun!